Delivery Options v5.x (legacy)


This is the documentation for the legacy 5.x version of the Delivery Options. If you're looking for the documentation for the stable version, please see the stable documentation.
This is the MyParcel delivery options module for use in any e-commerce platform's checkout, by platform 1 (myparcel) and platform 3 (belgie) customers. It's used to show your customers the possible delivery and/or pickup options for their location, based on your settings. It only has the bare minimum css styling, so it should integrate with the design of your webshop easily.
Demo
We've made a tiny vanilla js demo on Codesandbox which you can use to see how the delivery options work in a simple environment.
Installation
Dependencies
We recommend using a CDN to load Vue.js 2.6 and the delivery options. If you're using a package manager, you can also install it locally.
CDN
<script src="https://cdn.jsdelivr.net/npm/vue@2.6.14"></script>
<script src="https://unpkg.com/@myparcel/delivery-options@^5/dist/myparcel.lib.js"></script>
Package manager
Install @myparcel/delivery-options with your package manager:
npm install @myparcel/delivery-optionsIf Vue.js 2.6 is already loaded in your page, you can import the delivery options without Vue.js included:
import '@myparcel/delivery-options/dist/myparcel.lib.js';
Otherwise, use the following import to load Vue.js and the delivery options:
import '@myparcel/delivery-options';
Vue.js 2.7 and 3 are currently not supported.
Usage
Include Vue.js 2.6 and the delivery options in your page (see [Dependencies]).
Place
<div id="myparcel-delivery-options"></div>in your HTML.Provide a configuration via a
CustomEvent:document.dispatchEvent( new CustomEvent('myparcel_update_delivery_options', { detail: { config: { platform: 'myparcel', carrierSettings: { postnl: { allowDeliveryOptions: true, }, }, }, address: { cc: 'NL', city: 'Hoofddorp', postalCode: '2132JE', street: 'Antareslaan 31', }, }, }), );This is the most minimal configuration. For the delivery options to work:
config.platformmust be set to'myparcel'or'belgie'.- At least one carrier must be present in
config.carrierSettingswhich:- Has either delivery options or pickup locations enabled (
allowDeliveryOptionsorallowPickupLocations) - Is available in the current platform (
config.platform) - Is available in the current country (
address.cc)
- Has either delivery options or pickup locations enabled (
addressmust be set to an object with the following properties:cc(country code)citypostalCodestreet
The delivery options will be rendered inside the div you created before.
Check out the available options and usage examples for further configuration.
Available options
/** @type {import('@myparcel/delivery-options').MyParcelDeliveryOptions.Config} */
const config = {
  config: {
    platform: 'belgie',

    // Use this object to enable carriers and override settings per carrier.
    carrierSettings: {
      bpost: {
        deliveryDaysWindow: 7,
        allowDeliveryOptions: true,
        allowPickupLocations: true,
      },
      dpd: {
        allowDeliveryOptions: true,
        allowPickupLocations: true,
      },
    },

    // All settings below can be overridden per carrier via the carrierSettings object

    // The price for each option
    priceMorningDelivery: 7.95,
    priceStandardDelivery: 5.85,
    priceSameDayDelivery: 7.65,
    priceEveningDelivery: 6.25,
    priceSignature: 0.35,
    priceOnlyRecipient: 0.3,
    pricePickup: 5.85,

    // Shipment options
    allowSaturdayDelivery: true,
    allowPickupLocations: true,
    allowSignature: true,

    // Other settings
    dropOffDays: '1;2;3;4;5;6',
    cutoffTime: '15:00',
    deliveryDaysWindow: 4,
    dropOffDelay: 1,
  },
  strings: {
    saturdayDeliveryTitle: 'Zaterdaglevering',
    wrongPostalCodeCity: 'Combinatie postcode/plaats onbekend',

    // Address strings
    city: 'Plaats',
    postcode: 'Postcode',
    houseNumber: 'Huisnummer',
    addressNotFound: 'Adresgegevens niet ingevuld',

    // Delivery moment titles.
    // If any of these is not set, the delivery time will be visible instead.
    deliveryEveningTitle: 'Avondlevering',
    deliveryMorningTitle: 'Ochtendlevering',
    deliveryStandardTitle: 'Standaardlevering',

    deliveryTitle: 'Bezorgen op',
    pickupTitle: 'Afhalen op locatie',

    // Shipment options
    onlyRecipientTitle: 'Home address only',
    signatureTitle: 'Handtekening',

    pickUpFrom: 'Afhalen vanaf',
    openingHours: 'Openingstijden',

    // Other strings
    closed: 'Gesloten',
    from: 'Vanaf',
    loadMore: 'Laad meer',
    retry: 'Opnieuw',
  },
  address: {
    cc: 'BE',
    city: 'Antwerpen',
    postalCode: '2000',
    street: 'Adriaan Brouwerstraat 16',
  },
};
When there is no title set for deliveryMorningTitle, deliveryStandardTitleor deliveryEveningTitle , the delivery time will automatically be visible.
To get the object with the selected options from the delivery options do the following:
const data = document.querySelector('#mypa-input').value;
const obj = JSON.parse(data);

// `obj` will be something like this:
// {
//   "delivery": "deliver",
//   "deliveryDate": "8-8-2019",
//   "deliveryMoment": "standard",
//   "shipmentOptions": {signature: true, only_recipient: false}
// }
Usage Examples
These examples assume you've already loaded the delivery options in your page. See [Installation] if you haven't. You have to provide a configuration via sending a CustomEvent.
Setting up the configuration
This is an example.
/** @type {import('@myparcel/delivery-options').MyParcelDeliveryOptions.Config} */
const config = {
  config: {
    platform: 'myparcel', // REQUIRED!
    // platform: 'belgie', // For MyParcel BE. Note the platform affects which carriers are available.
    carrierSettings: {
      postnl: {
        allowDeliveryOptions: true,
        allowPickupLocations: true,
      },
      dhlforyou: {
        allowDeliveryOptions: true,
        allowPickupLocations: true,
      },
    },
  },
  address: {
    cc: 'NL',
    city: 'Hoofddorp',
    postalCode: '2132JE',
    street: 'Antareslaan 31',
  },
};

// Trigger this event on the document to tell the delivery options to update.
// Only needed on initializing and when the address changes.
document.dispatchEvent(
  new CustomEvent('myparcel_update_delivery_options', {detail: config}),
);
Getting the address from your environment
Set up the link between the address fields and the delivery options:
const countryField = '<Country field selector>';
const cityField = '<City field selector>';
const postalCodeField = '<Postal code field selector>';
const addressLine1Field = '<Address line 1 field selector>';

/**
 * Sends the event with the new address to the delivery options.
 *
 * @note `myparcel_update_delivery_options` can't update the config. Use `myparcel_update_config` for that.
 */
function updateAddress(myAddress) {
  // Get the address parts from your fields.
  const countryCode = document.querySelector(countryField).value;
  const city = document.querySelector(cityField).value;
  const postalCode = document.querySelector(postalCodeField).value;
  const addressLine1 = document.querySelector(addressLine1Field).value;

  document.dispatchEvent(
    new CustomEvent('myparcel_update_delivery_options', {
      detail: {
        address: {
          cc: countryCode,
          city: city,
          postalCode: postalCode,
          street: addressLine1,
        },
      },
    }),
  );
}

// Listen to changes in the fields and update the delivery options when they change.
const addressFields = [countryField, postalCodeField, addressLine1Field];

addressFields.forEach((field) => {
  document.querySelector(field).addEventListener('change', updateAddress);
});
Now, when a user changes the value in any of the fields set in addressFields the delivery options module will receive the new address. The delivery options will reload and fetch the available options for the new address.
Usage in forms
You'll often want to use the delivery options module in a checkout form in your webshop software. Below are some things to keep in mind, but if you're interested in doing this you should check out our Magento2 and WooCommerce plugins locally and read through these implementations. You can find the best files to get started with in [Integration examples]. We also recommend you join our [Slack] support channel to get (fast!) answers to any questions you might have.
- Follow the steps in [Installation]
- The things you'll need to do :
- Dispatch a
CustomEventwith the settings you want in the page where you're loading the delivery options. - Send events to the delivery options telling it when to update or rerender.
- Listen to the delivery options' events to update your application according to the changes.
- Attach the output data to the order that is being created.
- Dispatch a
Allowing or disallowing settings for specific countries
Let's say you want to disallow delivery to the Netherlands, only allow pickup in Belgium, for bpost. For DPD you want pickup only, wherever it's possible.
The configuration would look like this:
/** @type {import('@myparcel/delivery-options').MyParcelDeliveryOptions.Config} */
const config = {
  config: {
    platform: 'belgie',
    carrierSettings: {
      bpost: {
        // Allow delivery options in all countries it's possible in except the Netherlands.
        allowDeliveryOptions: {allow: false, items: ['NL']},
        // Only allow pickup locations in Belgium.
        allowPickupLocations: {allow: true, items: ['BE']},
      },
      dpd: {
        allowDeliveryOptions: false,
        allowPickupLocations: true,
      },
    },
  },
};
This is currently only possible for allowDeliveryOptions and allowPickupLocations. If you want this feature to be available for more settings, please create a feature request. Or, if you want to do it yourself you can send us a pull request!
Integration examples
Here are some existing implementations that can help you get started:
- From our WooCommerce implementation
- Backend: /includes/frontend/class-wcmp-checkout.php
- Frontend: /assets/js/wcmp-frontend.js
- From our Magento 2 implementation
It's more complex in Magento 2 because of the way its shipping methods work.
Attach data to an order using a hidden input
In WooCommerce and Magento 2 we injected a hidden text input inside the checkout <form> elements to hold this data and automatically pass it to the $_POST variable.
// Listen to the CustomEvent the delivery option sends back out once its data has been updated
document.addEventListener('myparcel_updated_delivery_options', (event) => {
  myHiddenInput.value = JSON.stringify(event.detail);

  // And now trigger updating the checkout of whatever platform you're using.
  // WooCommerce example:
  document.dispatchEvent(new Event('update_checkout'));

  // In Magento 2 we would update quote.shippingMethod here to trigger the changes.
});
Deselect options
You might want to integrate the delivery options into a list of existing shipping methods, like we've done in Magento 2. So when the user selects a different shipping method you'll want the delivery options to appear unselected.
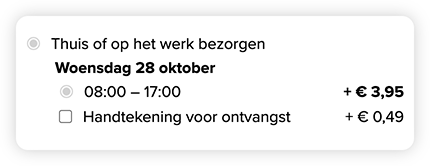
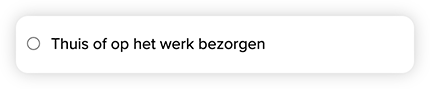
Note: If you only have one option, so either "delivery" or "pickup", the option will appear disabled. Until there's a built-in solution, there's the following workaround.
If you only use delivery:
document.getElementById(
  'myparcel-delivery-options__delivery--deliver',
).disabled = false;
If you only use pickup:
document.getElementById(
  'myparcel-delivery-options__delivery--pickup',
).disabled = false;
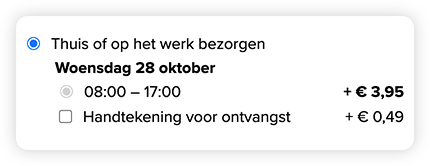
To deselect all options, dispatch the myparcel_disable_delivery_options event. You could do this as when your users select a different shipping method, for example.
document.dispatchEvent(new Event('myparcel_disable_delivery_options'));
The delivery options will look like this:
Contributing
- Fork this repository and clone it to your machine
- Run
npm install - Run
npm run serveto start the app - Make your changes conforming to our code style
- We recommend enabling ESLint in your editor to make this easier.
- Add/update unit tests if necessary.
- Commit, keeping the following rules in mind:
- We use Conventional Commits and semantic-release to simplify the process of releasing updates by automating release notes and changelogs based on the rules of @commitlint/config-conventional.
- If your commit messages aren't formatted according to these rules, Git hooks will prevent you from committing your changes.
- Create a pull request
- Keep your pull requests focused on single subjects.
- Please explain what you changed and why.
- We will check your code and thoroughly test it before merging.